
You want to create custom lanyards for your next event, but you’re not sure where to start. Don’t worry, we’re here to help! In this post, we’ll walk you through the process of creating custom lanyards from start to finish.
First, you’ll need to decide what type of lanyard you want. There are a few different options to choose from, including neck lanyards, clip lanyards, and badge holders. Once you’ve picked out the type of lanyard you want, it’s time to start thinking about the design.
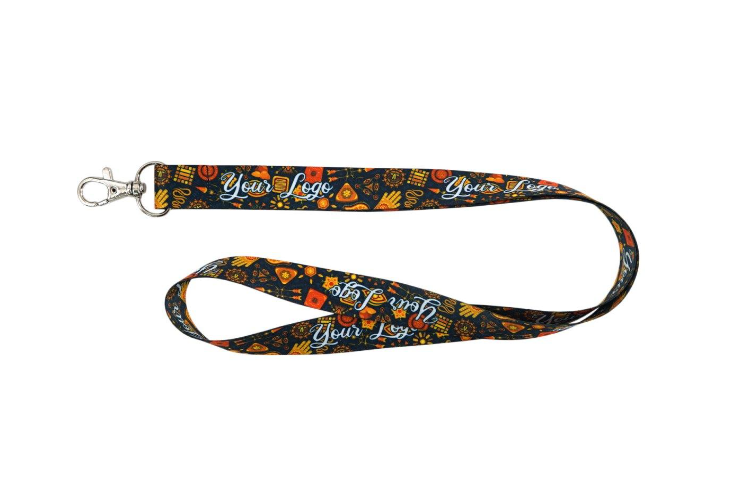
Your design can be anything you want it to be, from a simple logo or name to a more elaborate design with text and graphics. Once you’ve settled on a design, it’s time to start choosing the materials. Lanyards can be made from a variety of materials, including cloth, vinyl, and plastic.
Once you’ve chosen all the details of your design, it’s time to place your order! We’ll take care of the rest and make sure your lanyards are delivered on time and looking perfect.
Different Types of Lanyards
A lanyard is a cord or strap worn around the neck, shoulder, or wrist to carry items such as keys or identification cards. In its simplest form, a lanyard is a length of cord with a clip or clasp at one end for attachment to a carried object and a loop at the other end for attachment to a belt, button-hole or similar anchoring point. . Lanyards are commonly used in the workplace to display employee ID badges or to hold keys, flash drives and other small items.
They are used by students and others to carry items such as ID cards, keycards and small flashlights. Different types of lanyards are available, such as custom shaped pillows, each designed for a specific purpose. For example, if you want, you can easily make custom shaped pillows that will be very comfortable and functional for you.
If you’re looking for a lanyard for a specific purpose, or just want to learn more about the different types available, read a comprehensive guide to the different types of lanyards.
What You’ll Need
To make your own custom lanyards, you’ll need the following supplies:
-Lanyard buckles
-Lanyard straps
-Cord or ribbon
-Scissors
-Pins
First, cut your cord or ribbon to the desired length. You’ll want it to be about twice as long as you want the finished lanyard to be. Then, fold it in half and knot it at one end.
Next, put the lanyard buckle on one end of the strap and pin it in place. Make sure the straps are lined up evenly before you do this. Now, do the same thing on the other end of the strap.
Finally, put the cord or ribbon through the loops on both sides of the buckle and tie a knot. Voilà! You’ve just made your very own custom lanyard.
Step 1: Choose Your Lanyard Style
Now that you know the basics about lanyards, it’s time to create your own custom design. The first step is to decide on the style of lanyard you’d like.
There are several different options to choose from, so take a look at the gallery and see which style speaks to you. Once you’ve settled on a style, it’s time to get creative!
Step 2: Select Your Lanyard Attachment
Now it’s time to choose your lord. This is part of the lanyard that goes with your ID or badge. You can choose custom shaped pillows if you want. There are alternative options to choose from, but the best is the swivel clip.
It’s versatile and can go with pretty much anything. An alternative to developing politics is key rings, which are perfect for holding keys or other small items. Once you’ve made your selection, it’s time to move on to the next step.
Step 3: Choose Your Lanyard Color
Now it’s time to choose your lanyard color. We have a ton of options, so take your time and make sure you pick the right one for your event.
We have classic colors like black, navy blue, and red, but we also have some fun and funky options like hot pink, lime green, and purple. Or if you want to stay neutral, we have a bunch of grays and beiges to choose from.
No matter what color you choose, your lanyards will look great with your logo or text printed on them. So don’t wait any longer—pick out your favorite color and get started on your custom lanyards today!
Step 4: Add an Optional Logo or Design
Now it’s time to add your logo or design. This can be a great way to showcase your brand and set yourself apart from the competition.
Just remember to keep it simple. You don’t want your lanyard to be too busy or cluttered. A clean, professional design is always the best option.
If you need help with the design process, our team can help you out. We have a wide range of templates and designs to choose from, or we can create a custom design for you.
Step 5: Place Your Order
Now that you’ve designed your lanyard, it’s time to place your order. Just head over to our website and enter in all of the necessary details. We’ll take care of the rest!
We process all orders within 24 hours, so you can expect to receive your lanyards pretty quickly. And if you have any questions or concerns, don’t hesitate to contact us. We’re always happy to help!
Conclusion
It’s easy to create custom lanyards – all you need is a creative idea and a little bit of time.
Start by choosing the type of lanyard you want to create. There are a variety of materials and styles to choose from, so you can find the perfect one for your project.
Next, choose your design. You can create a simple design or get creative and come up with something more complex.
Finally, add your text or logo. You can use any type of text or logo, and you can choose from a variety of fonts and colors.
Once you’ve finished creating your lanyard, it’s ready to be printed and shipped. Order today and you’ll have your lanyards in no time!
More Stories
Versatile Universal Load Cell for Aircraft Weighing – MODEL: UNV, UNV-C
Why Hiring A Content Writer For Your Website Is A Smart Concept
Brazilian Hardwood Decking: The Ultimate Outdoor Solution